For Hand-Embroidered Felt Softies
This guide provides instructions specific to the patterns sold on this site.
All content is copyright by the author.
Table of Contents
Section 1: Get to Know Your Materials
Section 2: General Sewing Tips
Section 3: Learn Your Stitches
The Blanket Stitch (Common Edge)
Section 1: Get to Know Your Materials
Embroidery Floss
Embroidery floss is a loosely twisted 6-strand thread, typically made of cotton. You’ll find skeins (bundles) of floss in almost any craft or fabric store. Each skein is held together by small paper tubes on which the brand name and color number are recorded. If you are familiar with cross-stitch, this is the same type of thread used.
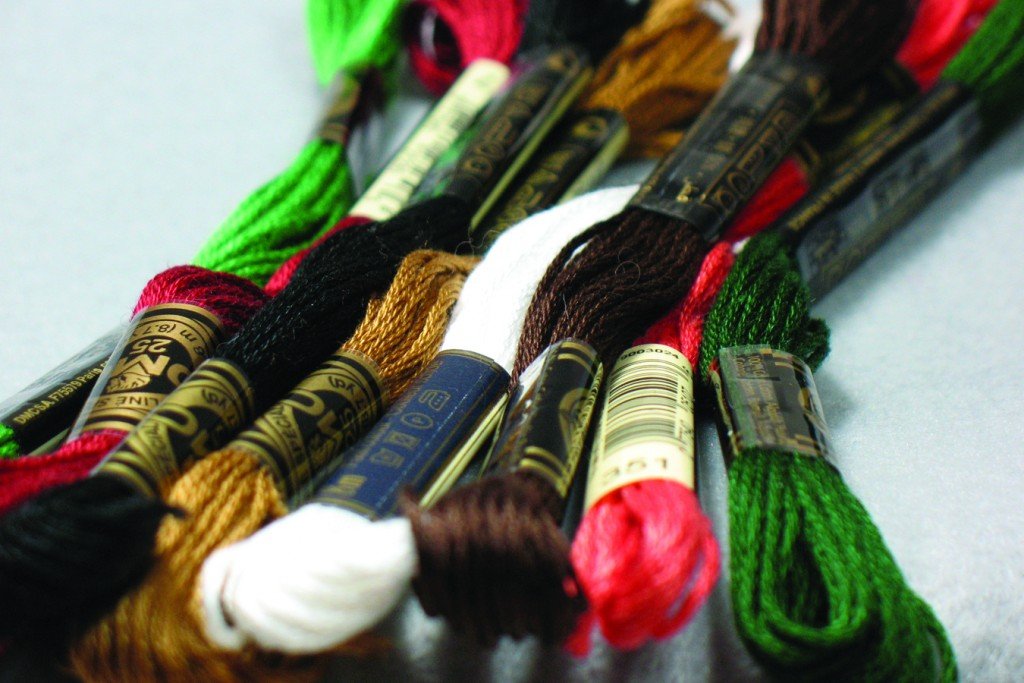
In my patterns I do not specify which brand or exact color to use, but simply suggest a general color for both felt and floss, since what you have available may vary, and I wouldn’t want you to get caught up in matching my prototypes exactly. Since felt colors are typically less varied than floss colors, I recommend shopping for your felt first, and then selecting floss that you feel coordinates well.
I use DMC brand floss almost exclusively but there are several other good options. Avoid generic brands like those found in dollar stores as the quality may not be as high. Because embroidery stitches are meant to be decorative, I typically use a contrasting color of floss so that the stitches stand out against the felt. With small patterns, I tend to use a matching floss, so that the stitching does not dominate the piece. You may prefer to do otherwise and are always welcome to substitute another floss color than what is called for by the pattern.
Cutting Floss Lengths
To prepare your floss for use, find the tail at the end of the skein. Hold the skein lightly with one hand while pulling
gently on the tail (all six strands) with the other. (If the tail doesn’t pull out easily, you may have started with the wrong end; try the other end.)
Once exposed from the skein, cut off your needed length of floss. Twenty inches (50 cm) is a good length to work with but to save time re-threading on larger stretches of your project, such as when you are blanket stitching your front and back body pieces together, you may choose to cut your length as long as 36 inches (90 cm). Remember that longer lengths will tangle more easily, so do take care to let your needle and thread “hang free” from time-to-time, so that a natural untwisting can occur.
Separating Strands
Now that you’ve cut a length off the skein, it’s time to separate the floss strands. Your pattern will direct you to use varying numbers of strands for different stitches within your project. Even when all six strands are called for, it is important to separate all the floss strands before sewing with them. The result will be smoother, less prone to tangling, and you will get fuller coverage on your fabric.
Separate your strands by firmly pinching a single strand with one hand, and gently pulling it away from the remaining strands which are loosely held by your other hand. Once separated, realign and smooth out the number of strands you need.

Needles

Sometimes called a crewel, an embroidery needle is narrow with a sharp point, and a larger than average eye to accommodate multiple strands of thread.
Embroidery needles come in various sizes: the higher the number, the finer the needle and smaller the eye. Typically you’ll want to choose an embroidery needle that has an eye only slightly thicker than your thread so that you will not make a larger than necessary hole in your fabric. However, when working with felt, this factor is not as important because of the forgiving nature of the fabric.
Typically embroidery needles come in multi-packs with size ranges like 1-5, 3-9, or 5-10. I typically work with needles in the size 3 to size 5 range. I suggest getting a multi-pack to see what feels comfortable and what you find easiest to thread.
Threading Your Needle
Needle threaders are available in fabric, sewing, and craft stores for a small price. They can be helpful, but you definitely don’t need one in order to thread your needle.
To do it without, line your floss threads up with each other and then slightly moisten the tips (lick your fingers and pinch, or yes, give them a quick suck) so they stick together. Then cut a fraction of the tips off at a slight angle and you should be able to thread them through your needle without too much effort.
Felt
Felt is a fun, soft, and versatile fabric to work with. It does not have raw edges and will not unravel. Because of its sturdiness you do not need to work with a hoop or frame when embroidering on felt.
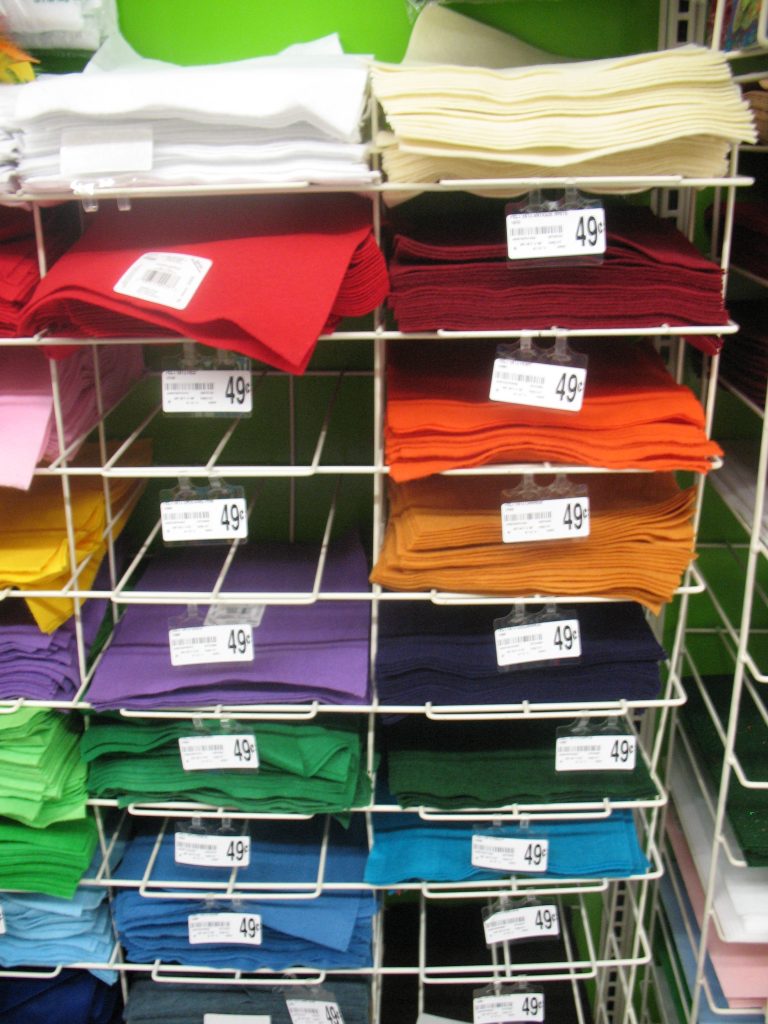
While you are welcome to try using 100% wool felt (go for a thin option if you do), I use craft felt and/or blended wool felt almost exclusively due to availability and cost. I have only encountered craft felt that was of inferior quality to the point that I had to reject it, one or two times—usually I find it to be excellent and durable to work with. (If you can easily see through it or it seems thinner in some spots, reject it.) Craft felt is typically made from a combination of fiber types including wool, acrylic, viscose, rayon, and polyester. Some eco-friendly felts are even made from bamboo or recycled plastic bottles. Felt from your craft or fabric store will come in bolts (rolls) or single pre-cut sheets. Sheets referenced within my patterns are the traditional ones found in craft stores, sized at approximately 9 by 12 inches (23 x 30 cm).
Section 2: General Sewing Tips
Transferring Patterns
Cutting Out The Required Felt Pieces
This is a pretty straightforward process. Simply cut out the paper pattern piece, temporarily attach it to the felt, cut around it, and detach from the felt. If the pattern piece is small enough, you won’t even need to attach the paper piece to the felt—just hold them both together with one hand while cutting with the other.
But how do you temporarily attach larger pattern pieces to the felt? The traditional way is to use straight pins. I still do this from time-to-time, but I’ve developed some shortcuts which I find to be much simpler.
One is to lightly apply clear glue stick to the paper pattern piece. It is usually not sticky enough to leave any residual glue on the felt once you remove it. If you’re concerned, you can always flip the paper pattern piece over before applying glue, so that if any remnants remain, it will be on the reverse of your felt.
My favorite option is to use scotch tape loops or double-sided scotch tape. It’s so quick to do and the felt separates from the paper so easily after you are finished cutting, with nothing remaining on the felt.
An advantage of using either glue or tape rather than straight pins is that using pins tends to bow (arch) your felt so that your cut is not 100% accurate; also it’s easier to do intricate cuts when you don’t have to work around pins.
Marking Your Felt With Stitch Guidelines (Optional)
When stitching an embellishment such as an eye line, a smile line, or similar directly onto a felt piece, you may feel comfortable doing so freehand, simply by looking at the line on the pattern piece and duplicating it with your stitching on the felt piece.
However, if you prefer to know exactly where your stitch should go, you can use the paper pattern piece to create guidelines on your felt first.
There are many aides available for transferring lines onto fabric including water erasable pens or dressmaker’s carbon. You may wish to visit your local craft or fabric store to check out the available options and find one that works for you.
My preferred method simply involves using an ultra-fine felt tip pen. Align the paper pattern piece over the felt piece, poke small holes with your needle along the line you’re marking, and then lightly dot with the pen through the holes and onto my felt. Then “connect the dots” with your stitches. If using this method, be careful not to make your dots too big, or your floss may not cover them when stitching.
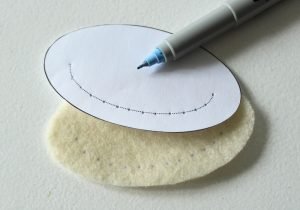
One limitation of this method is that it doesn’t work on dark felts. In this case, I actually cut into my paper pattern piece so that I can separate the paper along the line I need to mark, and then use white chalk to draw the stitch line, which can easily be brushed/blotted away after stitching. You’ll definitely benefit from purchasing dressmaker’s chalk, or a tailor’s chalk wheel, which produces a much more consistent line than a conventional piece of chalk, but in a pinch, work with the tools you have.


Reducing Patterns
One question I am continually asked is whether it’s possible to shrink certain patterns, particularly to make them usable as crib mobile decorations.
I always avoid making a recommendation on something that I haven’t personally done, so if you wish to try making a pattern at a smaller size than I’ve laid out, you do so at your own discretion.
If you are confident in your skills, you can undoubtedly shrink patterns with great success, by making a few adjustments.One factor to consider is that you may need to make substitutions to accommodate for pieces that become too small to cut from felt. For example, if the pattern calls for a felt eye piece that is half-an-inch wide, and you want to reduce the overall pattern to 25% of its original size, it would be difficult if not impossible to cut a piece that is one-eighth-of-an-inch from felt, not to mention sewing it onto your work. In this case, you’d need to simply stitch an eye using floss, rather than attaching a felt eye to your work.
Another factor to consider is stuffing. My patterns include information on where to pause when stitching front and back body pieces together, in order to stuff your creation. As a pattern is made smaller, it may prove difficult or impossible to stuff through small openings like necks, legs, or tails, so you would need to anticipate additional times to pause and stuff the affected parts of your creation.
These are just some of the factors to consider if you choose to make the patterns smaller than how they are originally laid out.
Section 3: Learn Your Stitches
Before your felt creations can come to life, you’ll need to learn some basic embroidery stitches. This guide will teach you several common stitches—some are so simple that you probably already know them, perhaps without knowing what they are called. Others may be new to you completely.
Please note that your pattern may not call for all stitches explained herein, so do refer to it first if you prefer not to learn more stitches than what you will need.
Some stitches can be made more than one way. If you know or find a technique with which you’re more comfortable, by all means use it! Feel free to experiment and see what works best for you.
Tip: Are you a visual learner? There are endless free video tutorials for learning basic stitches online. Plug the name of the stitch into your web browser and check out what comes up!
The Running Stitch
This stitch creates a dashed line.

To Start
Pass your embroidery floss through the needle. Make a knot in one end of your floss—keep the other end free. Run your thread up from the reverse side of the fabric so that the knot will be hidden when your project is finished.
To Make a Running Stitch
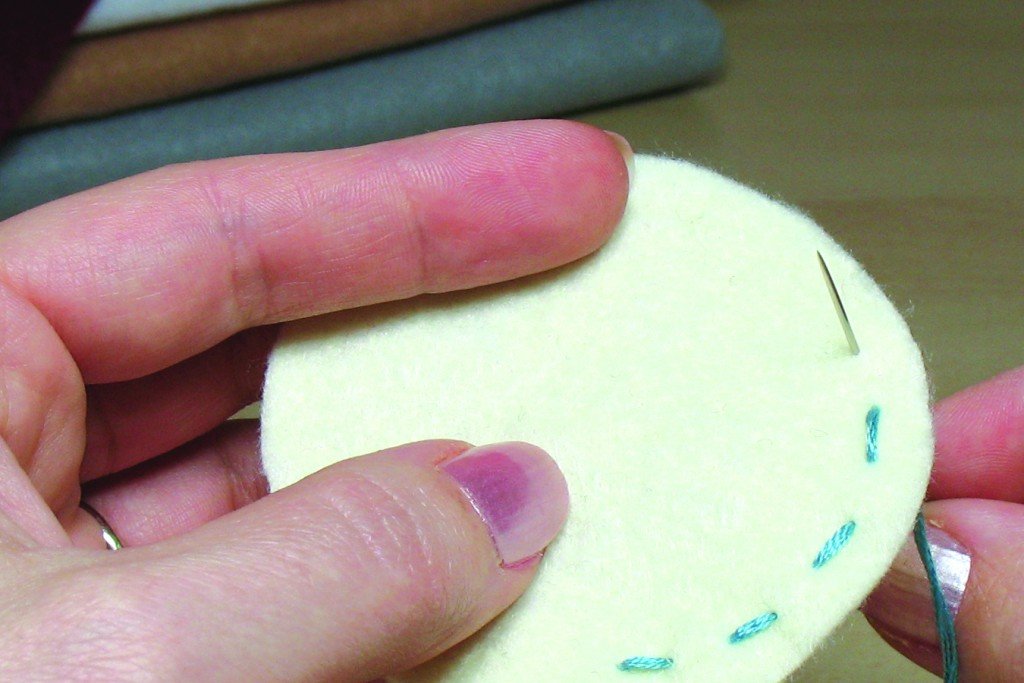
Weave your thread and needle in and out of the fabric. The stitches on the surface should be of equal length and evenly spaced.
To End
Bring your thread down to the reverse side of the fabric and either tie it off, or weave it through four or five stitches to anchor it. Cut it close to the final stitch.
The Backstitch
This stitch creates the appearance of a solid line.

To Start
Pass your embroidery floss through the needle. Make a knot in one end of your floss—keep the other end free. Run your thread up from the reverse side of the fabric so that the knot will be hidden when your project is finished.
To Make a Backstitch
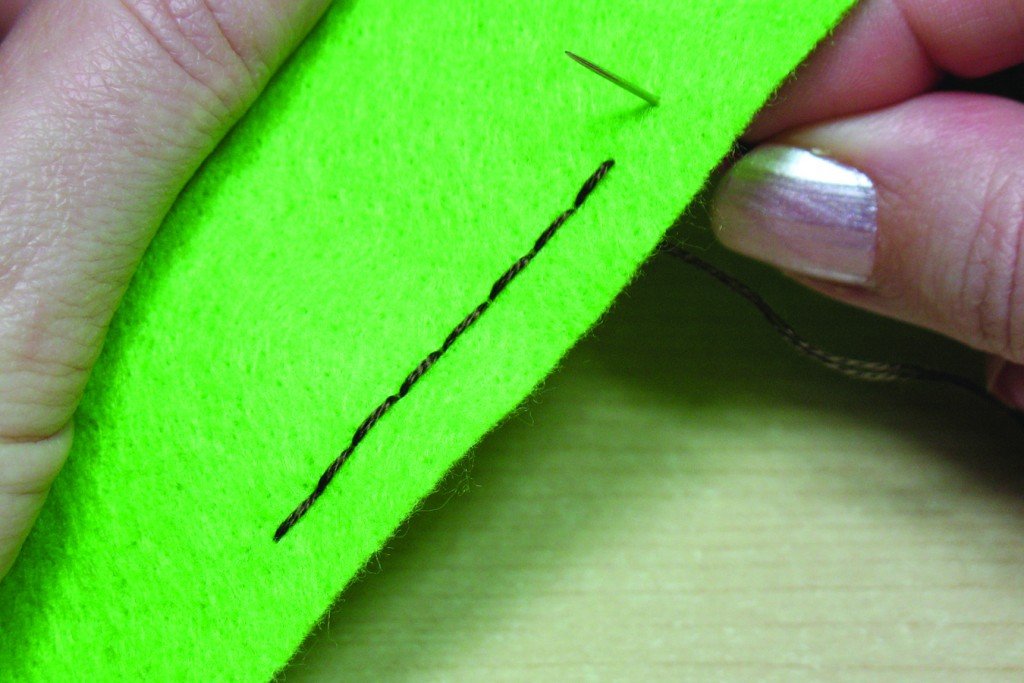
Bring your thread up on the stitch line and then make a small backward stitch down through the fabric. Bring the needle up again one stitch-length in front of the first stitch, then make another backward stitch, inserting the needle into the front hole of the stitch you just made. Continue in this manner, keeping your stitch lengths even.
To End
Bring your thread down to the reverse side of the fabric and either tie it off, or weave it through four or five stitches to anchor it. Cut it close to the final stitch.Tip: With practice, you will develop a keen sense for inserting your needle back into the precise spot on your felt that it previously passed through. When you place it right, your needle will almost “fall” through the felt, and your backstitch will appear even and continuous.
The Satin Stitch
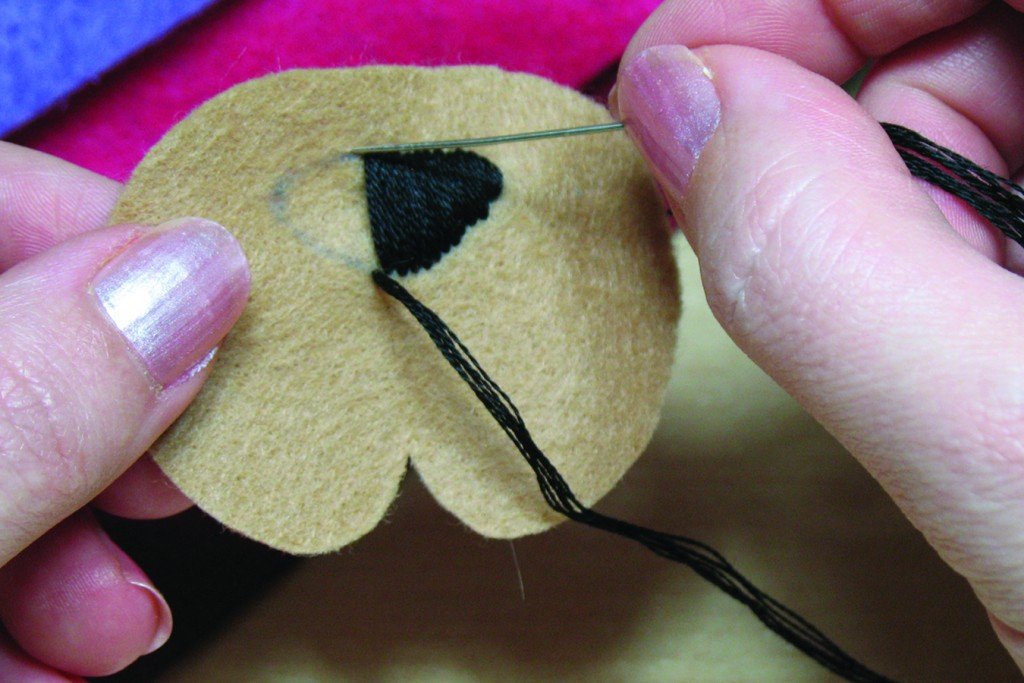
The satin stitch is used to completely fill in a small area with parallel straight lines of floss so that the fabric does not show through. When sewing animals, this stitch is commonly used for eyes and noses. Its name is the result of the stitch’s satiny appearance and feel.

To Start
Pass your embroidery floss through the needle. Make a knot in one end of your floss—keep the other end free. Run your thread up from the reverse side of the fabric so that the knot will be hidden when your project is finished.
To Make a Satin Stitch
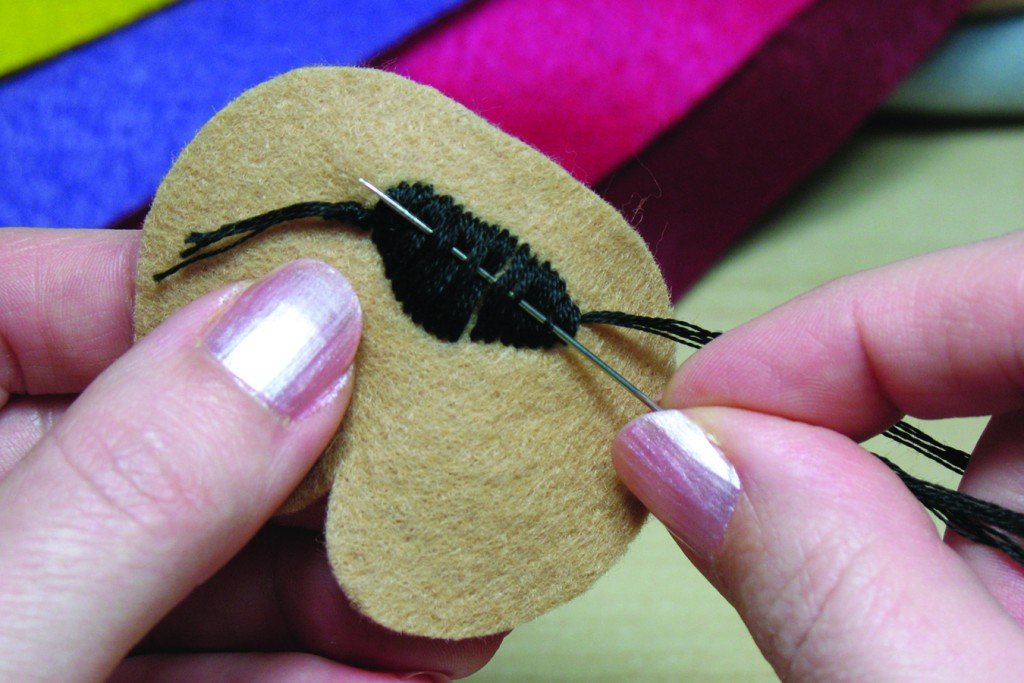
Make straight stitches across the shape, keeping your stitches snugly pressed together. Take care to line up your entry and exit points evenly. If you have traced or stitched an outline on the fabric, ensure your entry and exit points go just beyond the line so that it doesn’t show.
To End
Bring your thread down to the reverse side of the fabric and either tie it off, or weave it through four or five stitches to anchor it. Cut off.Tip: A great way to stay on track when making a satin stitch is to first backstitch the outline of the area to be covered. You will then have a handy guide for your satin stitching. Do ensure your satin stitch covers the backstitch guide line.
The French Knot
The French knot adds texture to embroidery projects by placing a three-dimensional ball of floss on your fabric surface. While it takes a little practice to get it right, it’s really not that hard when you get the hang of it. Some people avoid making them altogether. If you are one of these people, consider sewing small beads on your felt in place of French knots. But do give the French knot a try first!

To Start
Pass your embroidery floss through the needle. Make a knot in one end of your floss—keep the other end free. Run your thread up from the reverse side of the fabric so that the knot will be hidden when your project is finished.
To Make the French Knot
Holding your threaded needle above the felt with your right hand*, pinch the thread below the needle with your left thumb and pointer finger a few inches from where it emerges from the felt. Position the needle tip below the spot where you are pinching and wrap the thread snugly around the needle three times (A). Still pinching the thread snugly with your left hand, twist the wrapped needle tip back down to the felt and pierce through very close to where the thread first came up (B). Do not put it in the exact spot or your knot will pull back through. Keep snug pressure on the thread with your left hand as you pull the needle and thread through from the bottom of the felt. If done correctly this will leave a small knot on the surface.

To End
Anchor your thread to the underside of the fabric (without piercing the surface) and tie a knot, then cut off.
*Reverse instructions if you are left-handed.
The Split Stitch
This decorative stitch is created using multiple, even-numbered strands of embroidery floss. It is rarely used in my patterns, but is described here for the few times that it is.
To Start
Pass your embroidery floss through the needle. Make a knot in one end of your floss—keep the other end free. Run your thread up from the reverse side of the fabric piece so that the knot will be hidden when your project is finished.
To Make the Split Stitch
OPTION 1 – Forward Stitch Method: Create a single stitch in your fabric. From below the fabric, position your needle a little back of the front end of the stitch you just made, and bring it through to the top, splitting the threads of your first stitch two. Pierce back down though your fabric ahead of the first stitch. Continue along the stitch line in this same manner.

OPTION 2 – Backward Stitch Method: Create a single stitch in your fabric. Bring your needle back up a half stitch-length ahead of the first stitch, and then bring it down backwards through the first stitch, splitting the threads of that stitch in two. Continue along the stitch line in the same manner.

To End
Bring your thread down to the reverse side of the fabric and tie it off, or weave it through four or five stitches on the reverse side to anchor it. Cut off.
The Blanket Stitch (Common Edge)
The blanket stitch can be used to attach two pieces of fabric together along their common edges while maintaining an attractive appearance on both front and back.

To Start
Pass your embroidery floss through the needle. Make a knot in one end of your floss—keep the other end free.
To Make the Blanket Stitch
Align your front and back fabric pieces together, right sides facing out. From between the layers so your knot will be hidden, pierce your needle through the back piece of fabric, a little ways in from the edge of the fabric, pulling snug until the knotted end between the layers secures your thread in place.
Now bring your thread and needle over to the front and pierce through both layers in the same spot so that your needle comes out exactly where you just brought it through on the back. Pass your needle through the loop at the edge of the fabrics to anchor the floss.
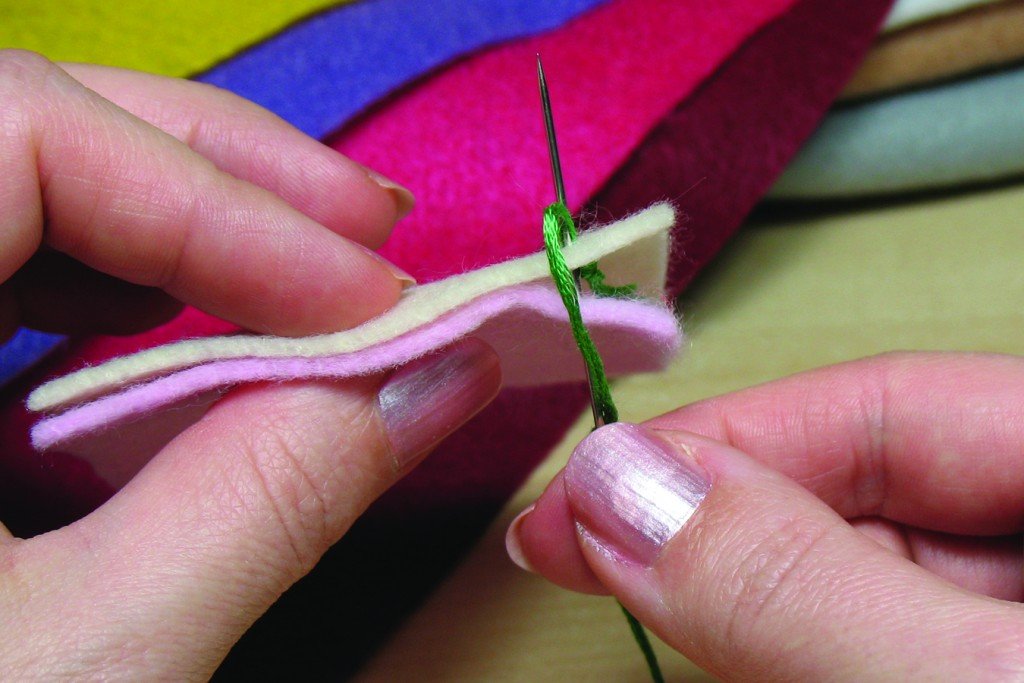

Next, from the front, pierce your needle through both layers a second time, a little to the left of the previous insertion point. Before pulling your thread through to the back completely, tuck your needle back through the loop that is closing along the felt edges. Continue to pull the thread snug and you will see that a line of floss begins to form along the edge where your fabrics meet. Repeat the motions described in this paragraph until you finish the piece or need to re-thread.

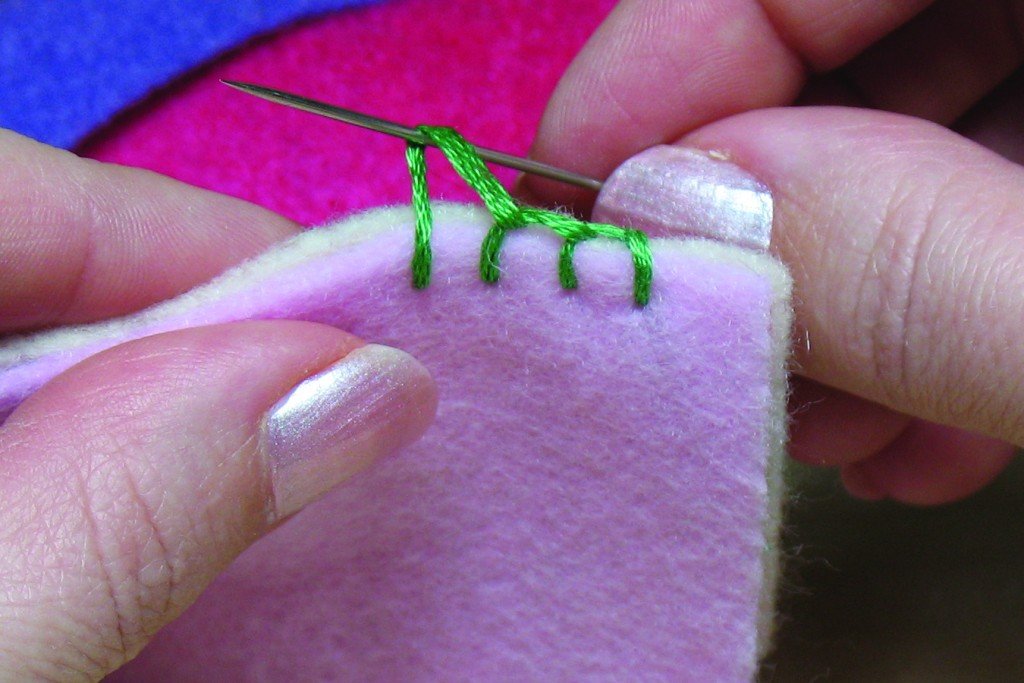
Tip: Typically, you’ll want your stitch width and depth to be the same; one-quarter of an inch (slightly less than half a cm) is a good approx length to use. Small projects may require even smaller stitches. If too large, your project edges will pucker.
To Re-thread
If you run out of thread before finishing your blanket stitch, you’ll want to be sure to hide your knots between the two layers. When your thread is close to the end, begin your last stitch but only pierce through the front piece of fabric. Pull your thread through snugly, then anchor and knot your thread to the inside of the front piece of fabric, being careful not to break the outside surface, so that your knot will not show from the outside. Cut your threads close to the knot.

Now, re-thread your needle. With your knot between the fabrics, pull through to the back in the spot where your last stitch would have come out if you had completed it. With your needle, grab the thread loop from the previous half-stitch on the front side, and pull it up so that it runs along the edge of your project. Continue your blanket stitch as before.

To End
When you approach the place you started, make your last full stitch, then slide your needle under your very first stitch, along the edge of the two fabrics and knot it. To hide the tail of your thread, slide your threaded needle between the front and back layers of felt at the spot where you tied off. Slide the needle completely in, piercing it back out to the outside of your project some distance away. Pull your thread taut while cutting it right at the surface of the fabric; once cut, the remaining thread tail will retreat back inside the body and be hidden.
General Tips
Blanket stitching around a protruding corner: Anchor your thread only slightly in from the edge of the fabric at the protruding point, instead of your usual stitch depth. Then continue stitching as normal on the other side of the point.
Blanket stitching around an indentation: Imitate a crow’s foot pattern when blanket stitching around an indentation. This will prevent your edge line of thread from pulling away from the fabrics.
Inserting an appendage between layers while blanket stitching: Some patterns call for items to be partially inserted between the two layers of felt that you are blanket stitching, such as in the sample picture where an elephant’s ear is inserted/anchored between the front and back body pieces. In this example, the edges of the ear have already been blanket stitched together in a previous step. As the elephant’s body (light gray) is blanket stitched together, the sewing is paused to insert the ear between the two layers, and then the stitching continues as before, along the edges of the body, but piercing through the inserted ear as it progresses.

If you can’t picture the process, watch my tutorial video to see how it’s done.
The Applique Blanket Stitch
As well as joining two pieces of like-sized fabric together along their common edge, the blanket stitch can also be used as a decorative way to fuse one piece of fabric on top of another larger piece of fabric.
With the common edge blanket stitch, your stitching hugs the edge of two or more pieces of aligned fabric. With the applique blanket stitch their is no aligning of edges—your stitching hugs the edge of only one piece of fabric, fusing it somewhere on top of, and in the middle of, a larger piece of fabric.

To Start
Pass your embroidery floss through the needle. Make a knot in one end of your floss—keep the other end free. Run your thread up from the reverse side of the base fabric piece so that the knot will be hidden when your project is finished.
To Make the Applique Blanket Stitch

1) Bring your thread up from the underside of the base piece at the point along the edge of the applique piece where you want your blanket stitching to begin.

2) Pierce back down through both layers slightly in from the edge of the applique piece, and on a 45 degree angle from where you first brought your thread up in step 1.

3) Bring your thread up directly beside your first exit point (in step 1) and directly below your first entry point (in step 2). Your thread must go through the loop created in step 2 in order to anchor your stitch.

4) When you pull your stitch tight, your thread will form a right angle.

5) Continue your applique blanket stitching by piercing back down through both layers, beside the entry spot in step 2.

6) Bring your thread back up directly below the entry point you just created. Remember to go through the thread loop on the front.

7) Pull your thread tight, and continue stitching in this manner.

NOTE: Once you have mastered the basic steps, you may be comfortable combining each entry and exit point in a single stitch, as shown above.

ENDING: For your final stitch, after pulling the previous stitch snug, pierce back down through your base fabric directly beside the previous exit point, along the edge of the applique. Anchor your thread to the underside of the base fabric (without piercing the surface) and tie a knot, then cut off.
The Whip Stitch
The whip stitch is a simpler substitute for the blanket stitch. Like the blanket stitch it can be used to join two pieces of felt along their common edge, or it can be used to applique one piece of felt on top of another.
I seldom use it in my patterns, but occasionally it is employed, and you may, of your own accord, substitute it anytime the blanket stitch is called for.
Making the Common Edge Whip Stitch
Starting with your knot between the two layers of felt, pierce your needle out through the back, then bring it to the front and pierce through both layers of felt a little ways over from the first stitch. Continue “whipping” your needle and thread around and around the edge of the felt. Use the same methods as the blanket stitch if you need to re-thread or when it’s time to tie off.

Making the Applique Whip Stitch
Fusing a piece of felt on top of another piece of felt is very easy with the applique whip stitch. From beneath both layers, bring your knotted thread up to the front through both layers of felt, near the edge of the top piece, then pierce back down right along the edge of the top piece, creating a small stitch that runs perpendicular with the top felt edge. Continue creating small parallel stitches in this manner. Note that if the felt piece you are appliqueing does not have a straight edge, your stitches will not be exactly parallel with one another, but they should always run at a right-angle to the edge of the felt piece, as illustrated to the right.

